Sunday, September 03, 2006 

Children need Cardboard


Eberechukwu, her name means "Mercy of God", is a little girl I met recently in Lagos Nigeria. She is over a year old and has not been able to sit up for more than a few minutes. When she was seated in this cardboard corner seat I made especially for her though, she sat happily and played for over an hour! Her mom is very happy to see her daughter sitting so beautifully. All it takes is a little cardboard, and "Queen of Cardboard" know-how.

Benneth Edeh, who's plea to help him become a "better OT", was the main reason I travelled to Nigeria to present an APT workshop, learned the basics via the internet using a kit with cardboard pieces I sent to him. The package took many months to arrive, and once it did the contents were not easy to figure out without a direct demonstration. He and I persevered, however, and he managed to construct this stool with only my electronic guidance. A first in "distance education" skill building!

If you want to build with cardboard, you have to make laminated boards for building and press them flat and dry them thoroughly before you begin cutting out the pieces.

A group of 19 people, from many areas of Nigeria, mostly with training in Occupational Therapy or other medical areas, including a prince and a chief, got together for a two week workshop in APT. They learned the basics of transforming cardboard, paper, and "throw-away" items, into durable, useful, and attractive furniture and rehab equipment.


Charles, Dawodu, and Tayo attended this APT Workshop that I presented in August/06 at the Federal School of Occupational Therapy (Psychiatric Hospital Yaba Lagos) and learned how to make corner seats and other needed equipment for children with disabilities in Nigeria.

Dawodu's first project was a paper hat from old newspapers. He used newspaper pictures and advertisements very creatively to decorate it.

Both Inside:

and Out.

Tayo transformed a plastic water bottle into a beautiful vase:

Chief Joe E. Nwegwu discovered new aspects of his creativity using old newspapers to make a new hat (he completed his Occupational Therapy training in Great Britain and is one of the instructors in the Federal School of Occupational Therapy).

Prince Mathias Ugiagbe Okoro is an Occupational Therapist in the Psychiatric Hospital-Uselu, Benin City.

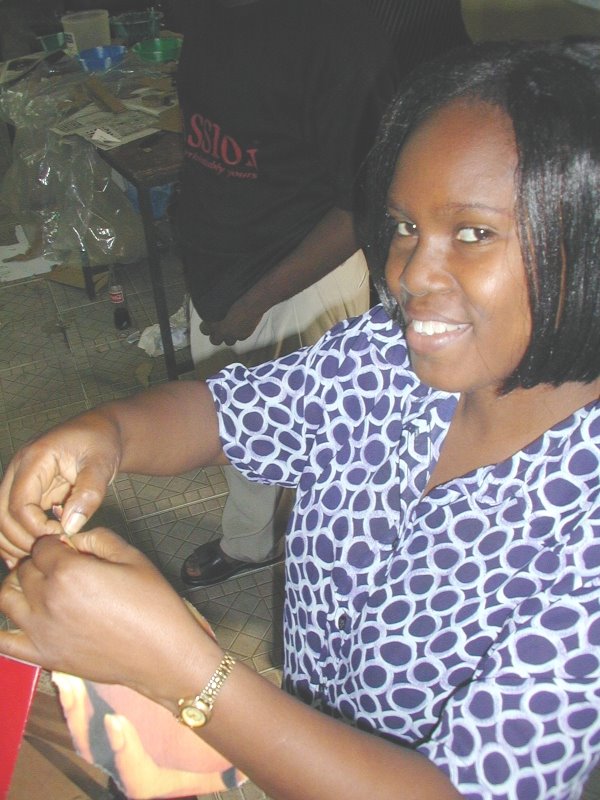
Adeola works as a nurse in the Psychiatric Hospital, Yaba Lagos. She learned new skills she plans to use in her work, and at the same time she said that she developed both her patience and creativity through APT.

Workshop participants took time away from their APT projects to eat the excellent food provided by the hospital kitchen. But as you can see, their projects were always close at hand.

Sunday, July 09, 2006 


Amazing table and chairs.
This smiling table and two "cat" chairs has been used for over a year now in the waiting room at a local hospital Occupational Therapy/Physiotherapy Department. Even with this constant use, it has proven very strong and durable. This same furniture was featured in a recent interview on Canadian national television "Canada A.M." with the Queen of Cardboard sitting on the table! Max and Minou, the two cat chairs, were delighted to make their television debut.

The Queen of Cardboard is about to embark on another adventure of travel: first to Australia, then to Nigeria in Africa. Stay tuned for more stories when she returns in September.

Sunday, June 25, 2006 

Finding Cardboard


Once upon a time, the Queen of Cardboard went to Haiti.


Just like she had seen in her dreams, the land was wounded with many many piles of garbage. The Queen knew very well that Haiti was such a beautiful land underneath, she wanted to help the people re-make it to be as beautiful as it once had been.

The Queen taught the children, and some of the adults, her secrets of turning ugly garbage into beautiful treasures and usable things. Soon, some of her helpers were bringing useful bits of cardboard, like the green "Sweetie" box this little girl is carrying on her head, right to the Queen's front door. Students in her class for making furniture out of paper and cardboard started picking up the useful bits of cardboard along the side of the road and bringing them to the class to use for building furniture. Of course they carried them in the baskets on their heads. They picked up other things too, like the plastic drink bottles that were everywhere, and they transformed them into useful little containers by covering them in strips of newspaper. They made fans out of scraps of cardboard. Fans are good to have in a hot country like Haiti! They made children's toys and puzzles out of cardboard covered in layers of newspaper and pieces torn from cement bags. They painted beautiful designs on their work with bright colours.

The students in her class all worked together and made two strong benches that could double as tables. They were so proud of their work and what they had learned about transforming garbage into treasure, that they never wanted to stop.


At last the day came and the Queen had to travel back to her home in Canada. The people that had just learned how to make useful things out of paper and cardboard wanted to keep working! They got together and formed a group so they could help each other. The Queen promised to return in one year to see how much they had done on their own, and to teach them new secrets for transforing trash into treasure.


But the story isn't over yet. People heard what the Qeen had done in Haiti. They were so impressed and infatuated with the very idea of making treasure out of garbage that they joined the Queendom of Cardboard right away. They gave her gold and jewels and all kinds of money to support her magic journey so she could travel and teach all around the world. Along the way, the Queen knew she would meet many new interesting people and make new friends who would help her even more. Others, like the Occupational Therapists in Nigeria, invited her to come and show them the secrets of building with paper and cardboard too. They wanted to learn how to make strong furniture and useful aids to help people with disabilities, by using old boxes and bags and envelopes and newspapers.


Late at night, if you listen very carefully, maybe you can hear the Queen whispering her secrets on the wind to you, and to all who will listen.
She knows that as more and more people listen and learn the magic of transforming throw-aways into useful objects, there will be less and less garbage in the world. When the Queen of Cardboard wakes up dancing now, every shiny morning, she is filled with delight that the world is getting beautiful again so she and all her people can live happily ever after.


newspaper layering techniques

This is the last day of the June 2006 workshop in Terrier Rouge Haiti. The students made a display of all the materials and their finished projects.

For those who would like to try their hand at making paper and cardboard creations, here are some basic instructions.

This is a cardboard hat I made using six layers of single/simple cardboard (from cereal or cookie boxes here) laminated in alternating directions to equalize the "pull" as it dried, this thicker base was for the brim. One layer of "cookie box" cardboard was molded to the size of my head, then used as the top part of the hat. I cut a fringe of slits in the hat part to attach it onto the brim.The blue colours come from ads on the flyers I used to layer over the cardboard base. The hat has been covered in plastic wrap to protect it for the purposes of this demonstration.

One of the first techniques to master is making "3-layer" newspaper, and tearing it into narrow strips that are placed over an object in layers of alternating direction. A very important attribute of paper is its "grain". Grain refers to the direction that the cellulose fibres are lined up.

This picture shows "3-layer" newspaper being torn both with the grain (the long straight strip), and against the grain (the short jagged tear on the left hand side. Paper does not tear easily across the grain.


Making the "3-layer" newspaper requires paste, and paper that has been prepared by tearing it into pieces of a workable size. 1/4 of a page of a large size newspaper, or 1/2 page of a smaller size newspaper seems to work well.


Paste is prepared by dissolving some flour in cool water until it is of a smooth and thick creamy consistency, then quickly adding boiling water while stirring. This cooks the gluten in the flour and makes a sticky paste.


Each sheet of newspaper will be covered in a thin layer of paste. The first sheet is pasted on both sides to stick it to the table and to ensure that the paste penetrates completely through the paper.


Once the paste is spread evenly over the newspaper (right out to the corners), the second sheet is placed carefully over top and the pasting is repeated.


The same thing is done for the third layer.


Now the "3-layer" is ready to use. It makes sense to prepare 6 - 10 pieces ahead of time. They can be folded and stacked, ready for use.


Now the newspaper can be torn along the grain into narrow strips, and pressed/massaged over the plastic covered form that is to be copied. The first layer will go in random directions, the second will be all horizontal, the third all vertical, the fourth and fifth all diagonal. This accomplishes two important things: firstly by layering in a number of different directions strength is given back to the cellulose fibres that were originally part of a strong tree, and secondly, the forces exerted by the shrinkage of the fibres as they dry are equalized. The equal pull in all directions helps to prevent warping of the object being made.


This shows horizontal layering.


Any object can be used as removable mold, or as a base to be layered over. A brick can become an attractive door stop. A bowl, platter, or lid from a pot can become a tray or a container. A plastic drink bottle (garbage) can be cut and layered over to be transformed into a beautiful little container for coins or jewellery.


So get out there and transform some garbage into treasure and make the world a better place!

Thursday, June 15, 2006 


I have just returned from three weeks in Haiti. I had the ride of a lifetime! And getting to the airport in the back of a pick-up truck was just the tip of the iceberg.
Every single moment was intense, every breath was fully alive and vibrant. It is hard to convey the reality of the experience with words, but I will try. Pictures help.
I returned to Haiti this year to continue the work I started in 2005 with a brief demonstration of APT.
This year, twenty people worked with me for 12 days to learn the basics of APT. They created many useful and beautiful items including two benches that can double as tables.


Here is the class with their diplomas - Level 1 APT. The workshop would not have been possible without Louise, she translated for me and helped with one of the groups while I was working with the other.


Iliana took the learning to a new level, using her imagination and working at home on her own - she created some wonderful toys (airplane, boat, cars).

It is a new idea for most of these people, to pick up scrap cardboard from the street and use it to make useful and fun things. Iliana has every right to be proud of her accomplishment. I can hardly wait to go back next year to see what she has come up with next.

Here are the two groups with their benches. The pieces have been tied together with loops cut from pantyhose, then glued and strapped down with single cardboard (like cereal boxes), then layered three times with "three-layer" newspaper in three different directions. The layering adds strength, alternating directions ensures that the forces of "pull" as the piece dries will equal out and the piece will be less likely to warp.

Here is Erick with a collection of "simple" cardboard. It is important to find local sources of materials. Once the workshop participants knew what to look for, they quickly collected the materials needed to finish the benches.

One thing there is a lot of in Haiti is cement bags! Once the bags are collected, they have to be torn apart and made ready for use.

Large pieces will be used to laminate into layers, and then combined to make boards. It takes about 15 layers of cement bag (three groups of 5 layers each) to make a useful board. Smaller scraps will be used to cover the finished projects to give them a final layer that will dry tight and give a good surface for decorating.

Here are some projects set out to dry.

The group has formed a committee with the plan to continue working on cardboard projects over the next year. They have a small amount of seed money to help with the cost of supplies (like charcoal and amidon powder to make the glue) and materials. Some people are now selling cement bags for 1 gourd each, they used to just give them away. Next year they want to try a larger and more complicated project - an easy chair.

Sunday, March 12, 2006 

APT Nigeria Project


My friend Benneth Edeh lives in Lagos, Nigeria. He just graduated from the first Occupational Therapy program offered there. Rehabilitation is a relative new-comer to healthcare in the developing world. At the moment, although he is very interested in working as an Occupational Therapist there is no job available for him. He has agreed to coordinate a project to bring Appropriate Paper Technology to his country. There will be a two week long workshop in August, 2006. The "Government of Nigeria Occupational Therapy Program" will sponsor it, and I will be the presenter.

The long range plan is to set up a permanent workshop space complete with the necessary tools and a coordinator to ensure that therapists who learn APT are able to continue to develop their skills. Fundraising to achieve this important aspect of sustainability is underway. The target is $10,000 by August 2006 and approximately one thousand has been collected so far. Please email Benneth at: bennethbenneth@yahoo.com , he would love to hear from you.

Here are some details about how to attach the top of a small stool.

If the project is small, then it is not really necessary to tie the top onto the base. Strapping with single layer cardboard so that all the corners (inside and outside) are attached securely will be
sufficient to hold the piece together.


If you do want to tie the top and bottom together to add extra strength and stability, first mark where the holes will be made. One hole on each side of the leg piece, and one going through the leg piece about an inch up from where the two pieces (leg and top) meet.

The picture above shows the hole markings for the holes that will go through the top piece of the stool. The view is looking down onto the inside of the top piece. The part of the legs that will rest on the floor is closest to the camera. The next view shows where the holes will go through each of the legs (upper hole markings).


The following examples are shown on small pieces of cardboard.
First mark the outline of the leg piece, then mark the three holes. Use an awl or a large nail to make the holes. Twist the awl around and around in the hole to make sure it is big enough for the needle to pull the loop through.


Place the pieces together with glue on both sides. They will be at 90 degrees to eachother. Then insert the loop (or other tie) into the holes and tie it securely on the inside of the project. What will be left showing on the top surface is a straight line of the tie, between the two holes. All the extra material where the knots is made will be tucked into the hole, or under the edge of the glued cardboard.
This shows how the two pieces are joined at right angles, with the tie holding them securely together.


Below is a view of the loops securely tied on two legs, the ends will be tucked back into the holes, or under the edges of the cardboard to make a smooth surface for the strapping that will be the next layer to cover the project.


The next picture shows a bench, it has two sets of the cross piece legs. You can see the ties on the right of the picture, this is the underside of the bench, the ends are tucked in neatly.


Making the Ties
You can cut 1 inch wide strips from old nylon stockings or pantyhose. Other strong string or cord can be used if you do not have the stockings. The loop made by cutting across the leg of a stocking is very easy to thread through the holes made in the cardboard by using a wire needle. The stockings are stretchy and relatively easy to tie. Get another person to hold the first knot tight while you tie the second one. This can be a tricky job if your hands are covered in slippery paste. The needle can be made from a large paper clip, or a large staple taken from a shipping box, or other wire that you have. Bend a narrow loop into one end of the wire (the needle should be about 3 or 4 inches long).


Good luck with tying your stools, benches, and tables together.